This is an adaptation of Webcam Pi intended to be used alongside some components from the Apple iSight webcam. If you're interested in building this, follow this documentation and my YouTube video!
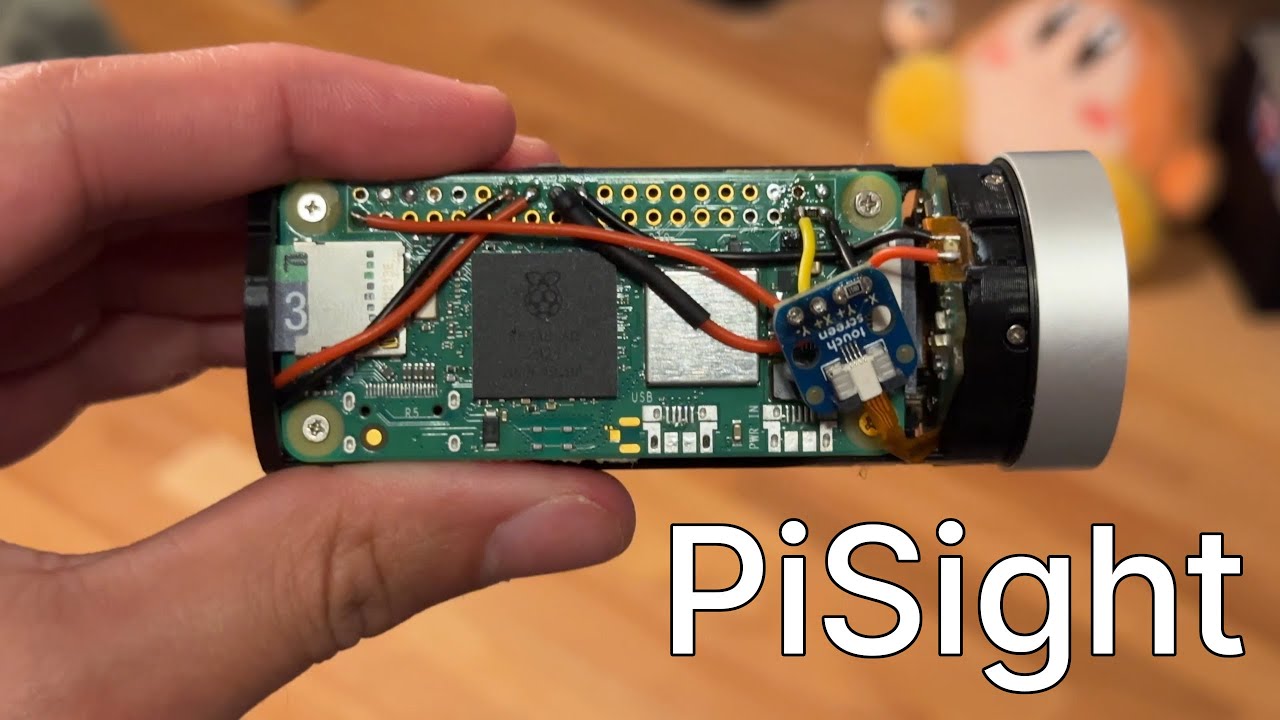
| Part | Description | Buy / Download |
|---|---|---|
| Apple iSight | The shell for the camera | eBay |
| Raspberry Pi Zero 2 W | Main compute module | Adafruit |
| Camera Module 3 | CSI-2 camera module | Adafruit |
| microSD card (≥100 MB) | System storage | Amazon |
| USB-C cable | USB-OTG data & power | Amazon |
| USB-C female breakout board | Replaces original micro‑USB port | Amazon |
| Touchscreen breakout board | Shutter (IR sensor) adapter | Adafruit |
| Resistors (330) | Activity/logo LEDs | Amazon |
| Resistors (5.6k, 150) | Shutter sensor | Amazon |
| Adafruit Sequin LED | Optional Apple logo back‑light | Adafruit |
| Any soldering iron | Wire soldering needed | Amazon |
| Any drill with a 5/64 in bit | For swivel slot hole | Amazon |
| 3D printed parts | Internal frame + mounting adapters | Printables |
PiSight keeps all the core functionality of Webcam Pi while adding hardware integration and quality‑of‑life features specific to the Apple iSight enclosure.
- Apple iSight enclosure compatibility
- Lets you retain the original iSight’s tilt and axial twist
- Reused original activity LED
- Optional rear Apple logo illumination
- Integrated IR shutter / privacy sensor
- For more info about how the sensor works check out: isight-shutter
- USB‑C breakout replaces the original connector area
- Enumerates as a UVC device named “PiSight” (instead of “Webcam Pi”) with an updated manufacturer string
- Download the latest image from the Releases page.
- Insert your microSD card into your host computer.
- Flash the image:
- Linux/macOS:
# Replace /dev/sdX with your card device
sudo dd if=pisight-<version>.img of=/dev/sdX
- Windows:
Use a tool like Balena Etcher or Raspberry Pi Imager

- Insert the flashed microSD card into the Pi.
- Assemble the camera (YouTube at the top video shows how I did it).
- Plug an USB-C cable into the camera and the other end into your host USB port.
- On your host machine, a new video device should appear.
- Linux host (WSL is fine)
- Git and buildroot dependencies
git clone --recursive https://github.com/elcalzado/pisight.git
cd pisight# This will configure Buildroot and compile the kernel, rootfs, and image
./build.shWhen complete, the final SD card image will be in:
buildroot/output/images/sdcard.img
Flash it as described in Installation.
- webcampi: The embedded linux image from which pisight is derived.
- original pisight: The project that inspired this!
- isight-shutter: Brief documentation for the Apple iSight's shutter sensor.